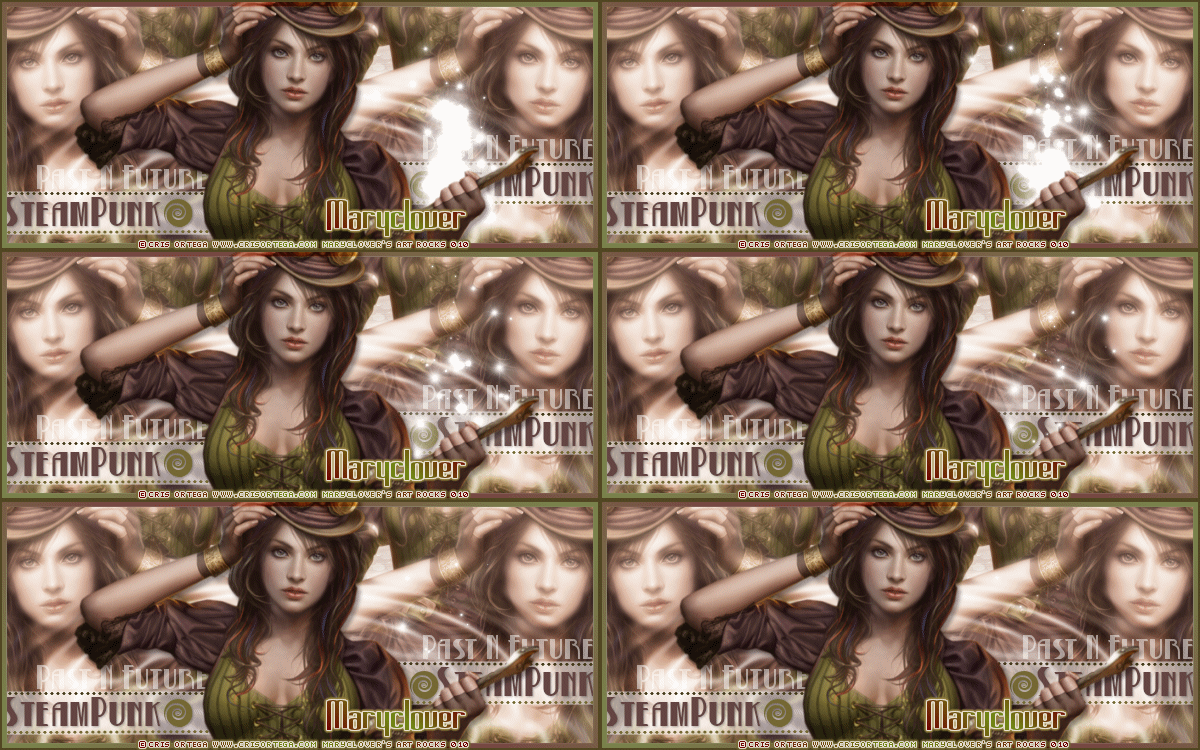
Hyia ladies, I just finished this set and ava below inspired by SteamPunk theme, and I used the amazing FTU tube by Cris Ortega. I hope you all like them. If someone wants to request them just send me an e-mail: marirbarbosa85@gmail.com, and tell me the name you want on the banner and ava. No big names, please. Open only until Tuesday 12th. Thanks so much for looking!
sábado, 9 de outubro de 2010
quinta-feira, 7 de outubro de 2010
Tutorial Halloween Town
Tweet
Materials:
A tube of your choice. I used the tube FTU by ©Noflutter, you can get part of groups that have permission from the artist to use his art. Example of a group that I belong and that is allowed: DragonsLairTubes HERE
Scrap kit PTU Ghost Town by Clarey's Designz, that you can purchase HERE
Masks 210 InsatiableDreams and WSL_Mask318, that you can get HERE e HERE
A font of your choice. I used a font called Halloween_Mirage
Program PSP X or higher (you can use older versions too)
Let's Go!!!!
:::I hope you've liked it:::
Until the next tutorial!
http://maryclovertagsetutos.blogspot.com/
Tube: © Malcolm
http://malberri.deviantart.com
Scrap kit: Ghost Town by Clarey's Designz
http://www.clareysdesignz.blogspot.com/
Font: Halloween Mirage
Created by Maryclover in 07th October 2010
A tube of your choice. I used the tube FTU by ©Noflutter, you can get part of groups that have permission from the artist to use his art. Example of a group that I belong and that is allowed: DragonsLairTubes HERE
Scrap kit PTU Ghost Town by Clarey's Designz, that you can purchase HERE
Masks 210 InsatiableDreams and WSL_Mask318, that you can get HERE e HERE
A font of your choice. I used a font called Halloween_Mirage
Program PSP X or higher (you can use older versions too)
Let's Go!!!!
1 - Open a transparent image 800 X 700 and paint it white
2 - Open the paper clarey_ghosttown_paper6, resize to 800 pixels, copy and paste as new layer. Apply the mask 210InsatiableDreams. Merge Group, and duplicate the mask. Open the paper clarey_ghosttown_paper2, resize to 800 pixels also. Apply the mask and WSL_Mask318 Merge Group
3 - Open the frame clarey_ghosttown_acryllicframe, resize to 650 pixels, and copy and paste as new layer. Click on it with his magic wand and go to Selections / Modify / Expand and place 5. Selections / Invert
4 - Open the paper clarey_ghosttown_paper2, copy and paste as new layer. Press Delete. Selections / Select None
5 - Open the tube you choose, copy and paste as new layer below. Resize and arrange as desired.
6 - Open-clearwindows clarey_ghosttown_hauntedhouse elements and clarey_ghosttown_hauntedhouse2, copy and paste as new layer below the frame. Resize 70% and 60% respectively. Straighten both on each side of the frame.
7 - Open clarey_ghosttown_glittertrail2 element, copy and paste as new layer. Loosen the bottom of the frame
8 - Open clarey_ghosttown_grass1 element, resize to 200 pixels. Copy and paste as new layer. Place the bottom of the frame. Double check all frame by adjusting the tag as above.
9 - Open frame clarey_ghosttown_orangeframe, copy and paste as new layer resize tube below 60%. Position in the right corner of the tag and tilt slightly to the Deform tool. Copy and paste the tube again and let in only the frame profile. Then paste the tube once more and go to Image / Mirror. Delete scraps that were left outside the frame of the two rectangles. In duplicate layer of the tube profile, go to adjust / blur / Gaussian blur and set 3. In the same layer change the blend mode to soft light and leave the opacity at 71. In the original layer change the blend mode to screen and apply the plugin Xero / bad dream. Click OK Do the same process that has left the tube in the other rectangle Mirror
10 - Open clarey_ghosttown_cauldron element, resize 45%. Copy and paste as new layer. Place the left corner of frame. Open clarey_ghosttown_grass2 element, copy and paste as new layer. Resize 45%. Place the layers below the melting pot and the cat and swing. Duplicate and mirror and double again to complete the floor in the tag
11 - Open clarey_ghosttown_spiderweb2 element, resize 60%. Copy and paste as new layer. Place the left corner of frame.
12 - Open element clarey_ghosttown_pumpkin3 and clarey_ghosttown_pumpkin4, resized 60%. Copy and paste as new layer. Position in the right corner of the frame.
13 - Open clarey_ghosttown_pumpkinstring element, resize to 200 pixels. Copy and paste as new layer. Place on top of the frame with two rectangles.
14 - Open the elements and clarey_ghosttown_sparkles2 clarey_ghosttown_sparkles3, copy and paste as new layer above the mask. Resize and arrange on the left side. Duplicate and mirror.
15 - Apply Drop Shadow on all elements in the settings: 4 / 3 / 40 / 6.00
16 - Sign and tag in the credits. Go to Layers / Merge All and save to Jpeg.
2 - Open the paper clarey_ghosttown_paper6, resize to 800 pixels, copy and paste as new layer. Apply the mask 210InsatiableDreams. Merge Group, and duplicate the mask. Open the paper clarey_ghosttown_paper2, resize to 800 pixels also. Apply the mask and WSL_Mask318 Merge Group
3 - Open the frame clarey_ghosttown_acryllicframe, resize to 650 pixels, and copy and paste as new layer. Click on it with his magic wand and go to Selections / Modify / Expand and place 5. Selections / Invert
4 - Open the paper clarey_ghosttown_paper2, copy and paste as new layer. Press Delete. Selections / Select None
5 - Open the tube you choose, copy and paste as new layer below. Resize and arrange as desired.
6 - Open-clearwindows clarey_ghosttown_hauntedhouse elements and clarey_ghosttown_hauntedhouse2, copy and paste as new layer below the frame. Resize 70% and 60% respectively. Straighten both on each side of the frame.
7 - Open clarey_ghosttown_glittertrail2 element, copy and paste as new layer. Loosen the bottom of the frame
8 - Open clarey_ghosttown_grass1 element, resize to 200 pixels. Copy and paste as new layer. Place the bottom of the frame. Double check all frame by adjusting the tag as above.
9 - Open frame clarey_ghosttown_orangeframe, copy and paste as new layer resize tube below 60%. Position in the right corner of the tag and tilt slightly to the Deform tool. Copy and paste the tube again and let in only the frame profile. Then paste the tube once more and go to Image / Mirror. Delete scraps that were left outside the frame of the two rectangles. In duplicate layer of the tube profile, go to adjust / blur / Gaussian blur and set 3. In the same layer change the blend mode to soft light and leave the opacity at 71. In the original layer change the blend mode to screen and apply the plugin Xero / bad dream. Click OK Do the same process that has left the tube in the other rectangle Mirror
10 - Open clarey_ghosttown_cauldron element, resize 45%. Copy and paste as new layer. Place the left corner of frame. Open clarey_ghosttown_grass2 element, copy and paste as new layer. Resize 45%. Place the layers below the melting pot and the cat and swing. Duplicate and mirror and double again to complete the floor in the tag
11 - Open clarey_ghosttown_spiderweb2 element, resize 60%. Copy and paste as new layer. Place the left corner of frame.
12 - Open element clarey_ghosttown_pumpkin3 and clarey_ghosttown_pumpkin4, resized 60%. Copy and paste as new layer. Position in the right corner of the frame.
13 - Open clarey_ghosttown_pumpkinstring element, resize to 200 pixels. Copy and paste as new layer. Place on top of the frame with two rectangles.
14 - Open the elements and clarey_ghosttown_sparkles2 clarey_ghosttown_sparkles3, copy and paste as new layer above the mask. Resize and arrange on the left side. Duplicate and mirror.
15 - Apply Drop Shadow on all elements in the settings: 4 / 3 / 40 / 6.00
16 - Sign and tag in the credits. Go to Layers / Merge All and save to Jpeg.
:::I hope you've liked it:::
Until the next tutorial!
Credits:
Art e Formatting by Maryclover
Tutorial by Marycloverhttp://maryclovertagsetutos.blogspot.com/
Tube: © Malcolm
http://malberri.deviantart.com
Scrap kit: Ghost Town by Clarey's Designz
http://www.clareysdesignz.blogspot.com/
Font: Halloween Mirage
Created by Maryclover in 07th October 2010
NOT PERMITTED:
Rename, edit or convert my Stats on Tags.
You may not modify my creations and remove my credits. Any resemblance to another tutorial is purely coincidental.
All material used in my tutorials are free, except when it is created for Designers' CT.
It is forbidden copy in whole or in part, or rewrite your credit as my tutorials.
It is forbidden to publish in groups, websites or blogs without my permission, to contact both the e-mail marirbarbosa85@gmail.com
If you run the tutorial do not forget to give credit for putting my name and link of the page http://maryclovertagsetutos.blogspot.com/
This and other tutorials are part of my blog http://maryclovertagsetutos.blogspot.com/
By using the formatting is consistent to keep the credits.
Rename, edit or convert my Stats on Tags.
You may not modify my creations and remove my credits. Any resemblance to another tutorial is purely coincidental.
All material used in my tutorials are free, except when it is created for Designers' CT.
It is forbidden copy in whole or in part, or rewrite your credit as my tutorials.
It is forbidden to publish in groups, websites or blogs without my permission, to contact both the e-mail marirbarbosa85@gmail.com
If you run the tutorial do not forget to give credit for putting my name and link of the page http://maryclovertagsetutos.blogspot.com/
This and other tutorials are part of my blog http://maryclovertagsetutos.blogspot.com/
By using the formatting is consistent to keep the credits.
No Copyright Infringement Intended
quarta-feira, 6 de outubro de 2010
NEW * Forum set and Ava Vampy Bella Swan - Request open
Tweet
Hyia ladies, I just finished this set and ava below inspired by Halloween, and I used the amazing PTU tube by April Howlett. You can purchase it at Mistaken art page, HERE. I hope you all like them. If someone wants to request them just send me an e-mail and tell me the name you want on the banner and ava. Thanks for looking!
Best Regards
segunda-feira, 4 de outubro de 2010
Tutorial Vampy Bella Swan
Tweet
1 - Open a transparent image 650 X 600 and paint it white
2 - Open the paper by WitchysHeart Paper # 7, copy and paste as new layer. Apply the mask dmsk00067. Merge Group, and arrange with the Deform tool
3 - Open Frame # 9 by WitchsyHeart, copy and paste as new layer. Resize 75%. Click on it with the Magic Wand tool, go to Selections / Modify / Expand and place 6. Selections / Invert
4 - Open the paper Paper # 3 by WitchysHeart, copy and paste as new layer below the frame. Resize to 500 pixels. Press Delete. Selections / Select none
5 - Open the tube you choose, copy and paste as new layer below the frame (if you use the same tube). Resize and arrange as desired.
6 - Open Element element Spider Web # 1 by WitchysHeart, copy and paste as new layer below the tube. Straighten the left lower side of the frame. Apply Adjust / Hue and Saturation / Colorize and choose the preset Grayton.
7 - Open Grass element Element # 1 by WitchysHeart, copy and paste as new layer below the bottom element. Resize to 400 pixels. Copy and paste as new layer. Place the bottom left corner of the frame. Duplicate and Mirror.
8 - Open Ivy element Element # 1 by WitchysHeart, resize to 400 pixels. Copy and paste as new layer. Place the left corner of frame. Duplicate and Mirror.
9 - Open the Moon Element Element # 1 by WitchysHeart. resize to 200 pixels. Copy and paste as new layer. Place the left corner of frame.
10 - Open the Old Log element Element # 1 by WitchysHeart. resize to 200 pixels. Copy and paste as new layer. Place the left corner of frame. Open Cloud Element Element # 1 by WitchysHeart, copy and paste as new layer. Position the cloud near the moon and swing.
11 - Open Snake element Element # 1 by WitchysHeart. resize to 200 pixels. Copy and paste as new layer. Position in the right corner of the frame.
12 - Apply Drop Shadow on all elements in the settings: 4 / 3 / 40 / 5.00
13 - If you prefer to finish putting some sparkle to your preference. In the kit itself has five different options to choose from. The ones I used are different.
14 - Sign and put the credits on the tag. Go to Layers / Merge Group and paste as new Animation using the right button. Open the bling and see how many frames have. Duplicate the tag to stick with the same amount of frames of bling. Click on the bling and go to Edit / Select All Do the same with the tag and then drag the bling to the desired location of the tag and release. Look how the animation is and save as Gif.
Créditos:
http://maryclovertagsetutos.blogspot.com/
Tube: ©April Howlett
www.monkeymintaka.deviantart.com
Scrap kit: Darkness by Creationz by WitchysHeart
http://creationzbywitchysheart.blogspot.com
Font: Anthem
Created by Maryclover® in October 4th, 2010
Materials:
A tube of your choice. I used the PTU tube by ©April Howlett, artist's link HERE. You need to purchase the tube before you use it at MTA - Mistaken Art, link HERE
You must not use that tube if you don't have a license number first.
Scrap kit Freebie Darkness by Creationz by WitchysHeart, that you can get HERE
Mask dmsk00067, that you can get HERE
Bling Nm_Flying_Bat_Anim, that you can get HERE
Program PSP X or higher
Animation Shop 3
Font Anthem or another
You must not use that tube if you don't have a license number first.
Scrap kit Freebie Darkness by Creationz by WitchysHeart, that you can get HERE
Mask dmsk00067, that you can get HERE
Bling Nm_Flying_Bat_Anim, that you can get HERE
Program PSP X or higher
Animation Shop 3
Font Anthem or another
Let's Go!!!
1 - Open a transparent image 650 X 600 and paint it white
2 - Open the paper by WitchysHeart Paper # 7, copy and paste as new layer. Apply the mask dmsk00067. Merge Group, and arrange with the Deform tool
3 - Open Frame # 9 by WitchsyHeart, copy and paste as new layer. Resize 75%. Click on it with the Magic Wand tool, go to Selections / Modify / Expand and place 6. Selections / Invert
4 - Open the paper Paper # 3 by WitchysHeart, copy and paste as new layer below the frame. Resize to 500 pixels. Press Delete. Selections / Select none
5 - Open the tube you choose, copy and paste as new layer below the frame (if you use the same tube). Resize and arrange as desired.
6 - Open Element element Spider Web # 1 by WitchysHeart, copy and paste as new layer below the tube. Straighten the left lower side of the frame. Apply Adjust / Hue and Saturation / Colorize and choose the preset Grayton.
7 - Open Grass element Element # 1 by WitchysHeart, copy and paste as new layer below the bottom element. Resize to 400 pixels. Copy and paste as new layer. Place the bottom left corner of the frame. Duplicate and Mirror.
8 - Open Ivy element Element # 1 by WitchysHeart, resize to 400 pixels. Copy and paste as new layer. Place the left corner of frame. Duplicate and Mirror.
9 - Open the Moon Element Element # 1 by WitchysHeart. resize to 200 pixels. Copy and paste as new layer. Place the left corner of frame.
10 - Open the Old Log element Element # 1 by WitchysHeart. resize to 200 pixels. Copy and paste as new layer. Place the left corner of frame. Open Cloud Element Element # 1 by WitchysHeart, copy and paste as new layer. Position the cloud near the moon and swing.
11 - Open Snake element Element # 1 by WitchysHeart. resize to 200 pixels. Copy and paste as new layer. Position in the right corner of the frame.
12 - Apply Drop Shadow on all elements in the settings: 4 / 3 / 40 / 5.00
13 - If you prefer to finish putting some sparkle to your preference. In the kit itself has five different options to choose from. The ones I used are different.
14 - Sign and put the credits on the tag. Go to Layers / Merge Group and paste as new Animation using the right button. Open the bling and see how many frames have. Duplicate the tag to stick with the same amount of frames of bling. Click on the bling and go to Edit / Select All Do the same with the tag and then drag the bling to the desired location of the tag and release. Look how the animation is and save as Gif.
::: I hope you've liked it:::
Until the next tutorial!
Créditos:
Art and Formatting by Maryclover
Tutorial by Marycloverhttp://maryclovertagsetutos.blogspot.com/
Tube: ©April Howlett
www.monkeymintaka.deviantart.com
Scrap kit: Darkness by Creationz by WitchysHeart
http://creationzbywitchysheart.blogspot.com
Font: Anthem
Created by Maryclover® in October 4th, 2010
NOT PERMITTED:
Rename, edit or convert my Stats on Tags.
You may not modify my creations and remove my credits.
Any resemblance to another tutorial is purely coincidental.
All material used in my tutorials are free, except when it is created for Designers' CT.
It is forbidden copy in whole or in part, or rewrite your credit as my tutorials.
It is forbidden to publish in groups, websites or blogs without my permission, to contact both the e-mail marirbarbosa85@gmail.com
If you run the tutorial do not forget to give credit for putting my name and link of the page http://maryclovertagsetutos.blogspot.com/
This and other tutorials are part of my blog http://maryclovertagsetutos.blogspot.com/
By using the formatting is consistent to keep the credits.
No Copyright Infringement Intended
Personal Use Only - Not For Profit!
TWI Proud Member
You may not modify my creations and remove my credits.
Any resemblance to another tutorial is purely coincidental.
All material used in my tutorials are free, except when it is created for Designers' CT.
It is forbidden copy in whole or in part, or rewrite your credit as my tutorials.
It is forbidden to publish in groups, websites or blogs without my permission, to contact both the e-mail marirbarbosa85@gmail.com
If you run the tutorial do not forget to give credit for putting my name and link of the page http://maryclovertagsetutos.blogspot.com/
This and other tutorials are part of my blog http://maryclovertagsetutos.blogspot.com/
By using the formatting is consistent to keep the credits.
No Copyright Infringement Intended
Personal Use Only - Not For Profit!
TWI Proud Member
sexta-feira, 1 de outubro de 2010
Tutorial Autumn Romance
Tweet
Materials:
A tube of your choice. I used the tube FTU by ©Noflutter, you can get part of groups that have permission from the artist to use his art. Example of a group that I belong and that is allowed: The Zone Groups AQUI
Scrap kit Freebie Autumn Romance by Cinnamon Scraps, that you can get AQUI
Mask sharlimarMask30-vi, that you can get AQUI
Programa PSP X or higher
Animation Shop 3 (you can use older versions too)
Let's Go!!!!
:::I hope you've liked it:::
Until the next tutorial!
Credits:
http://maryclovertagsetutos.blogspot.com/
Tube: © No Flutter
http://noflutter.deviantart.com/
Scrap kit: Autumn Romance by Cinnamon Scraps
http://cinnamonscraps.blogspot.com
Created by Maryclover in 1st October 2010
A tube of your choice. I used the tube FTU by ©Noflutter, you can get part of groups that have permission from the artist to use his art. Example of a group that I belong and that is allowed: The Zone Groups AQUI
Scrap kit Freebie Autumn Romance by Cinnamon Scraps, that you can get AQUI
Mask sharlimarMask30-vi, that you can get AQUI
Programa PSP X or higher
Animation Shop 3 (you can use older versions too)
Let's Go!!!!
1 - Open a transparent image 650 X 600 and paint in white
2 - Open CS_autumnromance_paper2 paper, copy and paste as new layer. Apply the mask sharlimarMask30-vi
3 - Open the frame CS_autumnromance_frame3, copy and paste as new layer. Resize 80%.
4 - Open the frame CS_autumnromance_frame8, copy and paste as new layer below the previous frame. Resize 75%.
5 - Open CS_autumnromance_sunflower1 element, copy and paste as new layer below the previous frame.
6 - Open the tube you choose, copy and paste as new layer. Resize as desired and arrange on the frame.
7 - Open frame CS_autumnromance_frame1, copy and paste as new layer. Straighten the lower left corner or wherever you prefer. Click on it with the Magic Wand tool and go to Selections / Modify / Expand and place 2. Go to Selections / Invert. Open CS_autumnromance_matte element, copy and paste as new layer below the frame and resize to 400 pixels. Press Delete. Selections / Select None.
8 - Copy and paste your tube again and place the frame on his profile go to Image / Mirror. Delete what's left of the tube that was outside of the frame. Change the Blend Mode to Hard Light. Apply Radiance plugin configuration you prefer and which most closely matches your tube.
9 - Open CS_autumnromance_tree2 element, copy and paste as new layer. Resize 60%. Place the right side below the larger frame. Duplicate and Mirror.
10 - Open CS_autumnromance_wordart1 element, copy and paste as new layer and position at the bottom of the tag.
11 - Open CS_autumnromance_bird element, copy and paste as new layer. Resize 40%. Place where you prefer.
12 - Apply Drop Shadow on all elements in the configuration: 4 / 3 / 50 / 6.00
13 - Sign and tag in the credits. Now the left hand tree, select a stem with leaves and go to Image / Cut. Paste as new layer. Duplicate as many times as necessary and drag each layer of the stem to a different position and close the visibility of layers after the finish to place them in the tag. All layers of the stalk with the leaves should be above the other layers and the tube.
14 - Let's bring the layers to Animation Shop. First check if the layers of the tree with the stem and other stems are cut with the visibility closed. Just leave it open to the entire tree and then click any other layer, copy merged and paste as new Animation. Return to PSP and close the visibility of the whole tree and open the tree without the stem. Copy Merged and paste as After Current Frame. Return to PSP and open the visibility of each layer of the stem lying on the position you prefer. My layer of the stem was doubled three times and in the end got a total of six frames. Now click the first frame to go to Effects / Insert Image Transiction and choose Fade. If you prefer to be based on my print below. Finally change the Properties frame, and the 1st and last frame will get 200; From 6 th to 9 th frame by frame in the frame put 50 properties. To view the final effect of the animation, go to Edit / Select All or press CTRL + A to select all the frames. Click View Animation and save on your taste was in Gif.
2 - Open CS_autumnromance_paper2 paper, copy and paste as new layer. Apply the mask sharlimarMask30-vi
3 - Open the frame CS_autumnromance_frame3, copy and paste as new layer. Resize 80%.
4 - Open the frame CS_autumnromance_frame8, copy and paste as new layer below the previous frame. Resize 75%.
5 - Open CS_autumnromance_sunflower1 element, copy and paste as new layer below the previous frame.
6 - Open the tube you choose, copy and paste as new layer. Resize as desired and arrange on the frame.
7 - Open frame CS_autumnromance_frame1, copy and paste as new layer. Straighten the lower left corner or wherever you prefer. Click on it with the Magic Wand tool and go to Selections / Modify / Expand and place 2. Go to Selections / Invert. Open CS_autumnromance_matte element, copy and paste as new layer below the frame and resize to 400 pixels. Press Delete. Selections / Select None.
8 - Copy and paste your tube again and place the frame on his profile go to Image / Mirror. Delete what's left of the tube that was outside of the frame. Change the Blend Mode to Hard Light. Apply Radiance plugin configuration you prefer and which most closely matches your tube.
9 - Open CS_autumnromance_tree2 element, copy and paste as new layer. Resize 60%. Place the right side below the larger frame. Duplicate and Mirror.
10 - Open CS_autumnromance_wordart1 element, copy and paste as new layer and position at the bottom of the tag.
11 - Open CS_autumnromance_bird element, copy and paste as new layer. Resize 40%. Place where you prefer.
12 - Apply Drop Shadow on all elements in the configuration: 4 / 3 / 50 / 6.00
13 - Sign and tag in the credits. Now the left hand tree, select a stem with leaves and go to Image / Cut. Paste as new layer. Duplicate as many times as necessary and drag each layer of the stem to a different position and close the visibility of layers after the finish to place them in the tag. All layers of the stalk with the leaves should be above the other layers and the tube.
14 - Let's bring the layers to Animation Shop. First check if the layers of the tree with the stem and other stems are cut with the visibility closed. Just leave it open to the entire tree and then click any other layer, copy merged and paste as new Animation. Return to PSP and close the visibility of the whole tree and open the tree without the stem. Copy Merged and paste as After Current Frame. Return to PSP and open the visibility of each layer of the stem lying on the position you prefer. My layer of the stem was doubled three times and in the end got a total of six frames. Now click the first frame to go to Effects / Insert Image Transiction and choose Fade. If you prefer to be based on my print below. Finally change the Properties frame, and the 1st and last frame will get 200; From 6 th to 9 th frame by frame in the frame put 50 properties. To view the final effect of the animation, go to Edit / Select All or press CTRL + A to select all the frames. Click View Animation and save on your taste was in Gif.
:::I hope you've liked it:::
Until the next tutorial!
Credits:
Art e Formatting by Maryclover
Tutorial by Marycloverhttp://maryclovertagsetutos.blogspot.com/
Tube: © No Flutter
http://noflutter.deviantart.com/
Scrap kit: Autumn Romance by Cinnamon Scraps
http://cinnamonscraps.blogspot.com
Created by Maryclover in 1st October 2010
NOT PERMITTED:
Rename, edit or convert my Stats on Tags.
You may not modify my creations and remove my credits. Any resemblance to another tutorial is purely coincidental.
All material used in my tutorials are free, except when it is created for Designers' CT.
It is forbidden copy in whole or in part, or rewrite your credit as my tutorials.
It is forbidden to publish in groups, websites or blogs without my permission, to contact both the e-mail marirbarbosa85@gmail.com
If you run the tutorial do not forget to give credit for putting my name and link of the page http://maryclovertagsetutos.blogspot.com/
This and other tutorials are part of my blog http://maryclovertagsetutos.blogspot.com/
By using the formatting is consistent to keep the credits.
Rename, edit or convert my Stats on Tags.
You may not modify my creations and remove my credits. Any resemblance to another tutorial is purely coincidental.
All material used in my tutorials are free, except when it is created for Designers' CT.
It is forbidden copy in whole or in part, or rewrite your credit as my tutorials.
It is forbidden to publish in groups, websites or blogs without my permission, to contact both the e-mail marirbarbosa85@gmail.com
If you run the tutorial do not forget to give credit for putting my name and link of the page http://maryclovertagsetutos.blogspot.com/
This and other tutorials are part of my blog http://maryclovertagsetutos.blogspot.com/
By using the formatting is consistent to keep the credits.
No Copyright Infringement Intended
quarta-feira, 29 de setembro de 2010
Tutorial Dark Mashka
Tweet
Estou voltando à ativa, depois de alguns meses ausente do PSP, porque estou escrevendo dois livros que pretendo vê-los publicados algum dia, e isso está tomando meu tempo livre que só agora pude me dedicar a criar tutoriais novamente. Dessa vez escolhi um kit scrap freebie da Tamie, muito super fabby por sinal. Espero que gostem do meu primeiro tutorial de retorno ao mundo do Paint Shop Pro. O tube que usei é da artista Lady Mishka e adorei a arte dela demais!!!
Previem e link do tuto em português logo abaixo. Breve postarei a versão em inglês. Aguardem!!
Abraços
XOXO.sábado, 17 de julho de 2010
Samples Forum sets que fiz!
Tweet
Olá meninas boa noite!! Esses dias estou sem Mojo pra fazer tutos e sem largar o PSP comecei a criar Forum sets e Avatars para usar em forum como o Creative Misfits do qual faço parte. Esses que vocês veem foram oferecidos lá. Espero que gostem. Tive que reduzir para caber no post. Mas para visualizar no tamanho real basta clicar na imagem. Bjuxxx.
Assinar:
Postagens (Atom)